Traditional Recipe for Probiotic-Rich Milk Kefir
Tara Carpenter, NC.
Nutrition Consultant helping people heal with therapeutic nutrition.

Originally published on October 12, 2018.
This traditional milk kefir has two ingredients; milk and starter. This is a straight up, simple recipe you can use again and again. I was introduced to kefir while healing with a dietary practice called The Body Ecology Diet (B.E.D.). This is the diet that helped me heal from a stubborn condition of yeast overgrowth riddling my body since the birth of my second child.
Milk kefir reduced my cravings, cleared my acne, and really took away endless stomach bloating. As did cultured butter and creme fraiche.

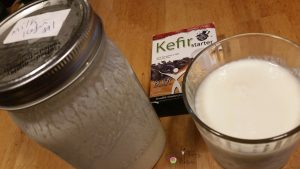
Here is the kefir starter I use to make milk kefir.
Why kefir is kefir.
When you kefir milk, the probiotics in the starter wake up and get to work digesting/splitting apart the milk protein (casein) and consuming the milk sugar (lactose), both which make the milk easier-to-digest …. especially if you are lactose intolerant. Kefir contains enzymes which puts milk kefir in the category of a pre-digested food rich in probiotics. Traditional milk kefir can help to keep the gut environment in a balanced pH state.
The recipe below is not made with ‘grains’ but with strains of flora desirable for those healing yeast overgrowth (i.e. Candida), bacterial infections (i.e. GBS+), or a viral condition (i.e. Coronavirus). This is not a wild ferment like other milk kefir (or kombucha) sold at the market.
The flora/probiotics in the starter coat the gut to create a perfect nest for them to live and colonize in. This is good, because the more good flora living in your gut, means less bad flora (yeast, bacteria, viruses) will be allowed to live in there. This is because the good flora kill them off, a.k.a. ‘die-off’ and keep them in balance. This is how milk kefir (+ other probiotic food) can help you; especially paired with Body Ecology Diet.

Tips and tricks for making milk kefir.
Easy to make.
Milk kefir is easy to make. Just go slow once you begin to drink (especially if you have dairy sensitivities) as the kefir strains in this kefir are more potent than what you might be used to and can activate new movement throughout your entire digestive system (mouth down to anus). So best to introduce milk kefir, and other unsalted cultured food, by the spoonful. I have clients who can only tolerate a teaspoon and build up from there. You must take this slow to bring in the benefits down the road. If you have a chronic digestive issue, you may want to avoid dairy, cultured or not, until your gut ‘heals n seals’ and/or until you digest food without discomfort.
Some people find taking a dairy-loving enzyme with dairy food to be helpful and these are the ones I most recommend in my nutritional practice, particularly if you struggle with digesting casein (milk protein).

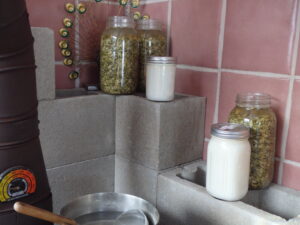
Letting milk kefir sit to gain probiotic life alongside jars of pumpkin seeds soaking in sea salt brine by the wood stove.
Traditional Milk Kefir
Instructions
- Thoroughly clean a Mason glass jar with an airtight fitting lid.
- Gently heat 1-quart of milk to skin temperature (about 92 F).
- Add packet of kefir starter*, whisk in a scoop of Ecobloom if using, and put a lid on the jar.
- Let sit at 72-75 F for 18-24 hrs. until slightly thick, with pleasant sour aroma and taste.
- Once thick, shake well, and put in the refrigerator.
*I use this kefir starter as contains a potent diversity of good flora strains that can’t be destroyed by antibiotics, fluoride, stomach acid, chlorinated water, etc. as they descend down the digestive tract. Unlike most probiotics on market, these strains remain intact as they travel to intestines to make home in the inner ecosystem to keep you balanced.
Transfer Instructions
- Don’t drink ALL of this initial batch you’ll want to begin another batch. This is called a “transfer” and is best done within 3 days of making 1st batch. That way things will be fresh and there’s less risk of your husband drinking it all before you make more 🙂
- If you want to make another quart of milk kefir, save 6 Tbsp. of initial batch and add that to warm milk. Best not to add more than recommended amounts or may get sour kefir and need to start over. You can repeat this transfer up to 7 times before you need to make a new batch with a new starter packet.
So, if you want…
1 quart of fresh kefir = add in 6 Tbsp. of your previous batch into this amount of fresh milk
1/2 gallon = 2/3 c. of previous batch ” “
1 gallon = 1 c. of previous batch ” “
On you go. Milk kefir does have a hard time “catching” after 10 or so transfers so bes to keep track which batch you are on so that you know when to start anew. With time, you will know this simply by smell and taste. My experience is the better care you take of your initial batches #1 and #2 then the more you can milk them. Pun intended!
May all bellies be happy!
Resources
https://bodyecology.com/kefirinstructions.php
Campbell-McBride, N. MD. (2011). Gut and Psychology Syndrome. Soham, Cambridge; Medinform Publishing.
Gates, D. (2010). The Body Ecology Diet. Bogart, GA: B.E.D. Publications
Disclaimer: This post may contain affiliate links for products I believe in and use on a regular basis. See more here. All content is for general information only, primarily educational in nature, and should not be treated as a substitute for the medical advice of your primary health-care practitioner that you, the reader, may require for any cause whatsoever, now or in future. Consult your primary practitioner regarding any health problem(s) you have and keep them informed to the opinions, ideas, and advice on this site that you find useful. Full disclaimer here. Please email tara@happybellies.net for any questions or concerns that you have.
© Happy Bellies Therapeutic Nutrition blog is copyrighted information. Do not repost my recipe or post on your blog, Facebook, or other website. Posting ingredients and sharing my photos is permitted with a link back to my site for full recipe or post.


